
Tek-Tip: Tools & Techniques for Cutting Rubber Molds
Some rubber molds require one or multiple cuts in order to remove the original model and subsequent castings.
Here are some tips regarding the tools and cutting techniques that we use here at
Polytek:
Tools that we use:
A tool like your kitchen paring knife will not work well for cutting rubber molds. At Polytek, we most often use the following:
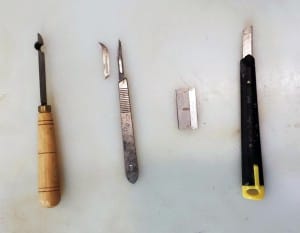
- Mold Key Knife
- Scalpel
- Razor Blade (one-sided for safety)
- X-Acto Knife
General notes about these tools:
- Mold Key Knives automatically create a tongue-and-groove pattern.
- Scalpels, razor blades and X-Acto knives can fit into tighter spaces/corners than mold key knives. Often, a mold key knife is used to create the first cut (this cut should not reach the model) and then a scalpel/razor blade/X-Acto knife is used to make the final cut.
- Depending on the rubber being cut, blades can degrade rather quickly (i.e., after cutting 2-3 molds), so it’s a good idea to keep multiple on-hand.
General notes on cutting rubber molds:
- It is very difficult to cut mold rubbers that are harder than Shore A45.
- Silicones are generally easier to cut than polyurethanes.
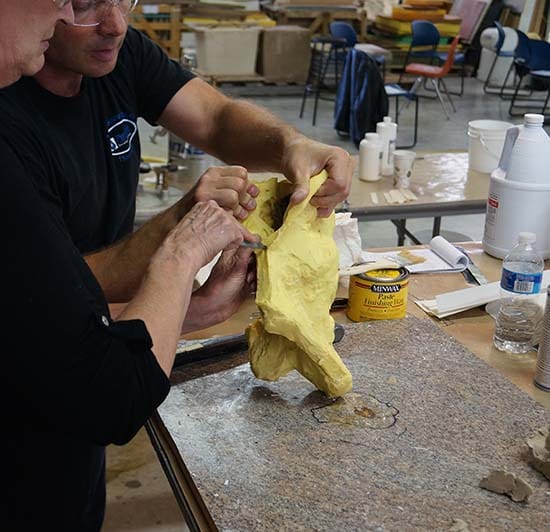
- To avoid damaging the model, the first cut should not go completely through to the model. As mentioned in the previous section, the final cut should be made with a scalpel or X-acto knife as these tools are more precise.
- Avoid making a straight cut in the mold; make a zig-zag/tongue-and-groove pattern for better alignment when casting.

Planning ahead:
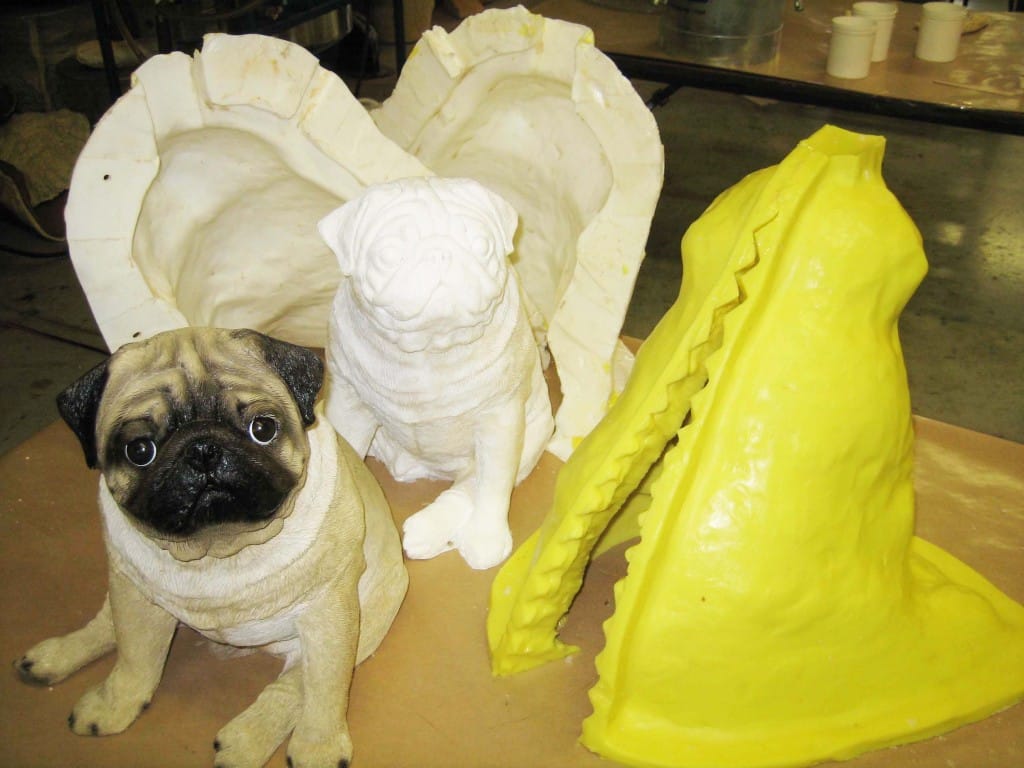
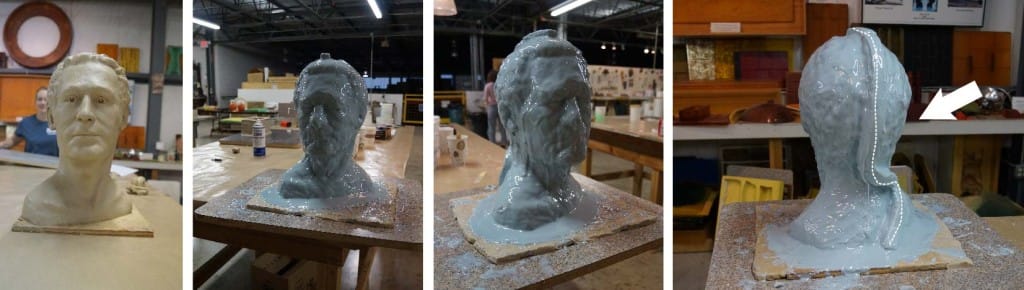
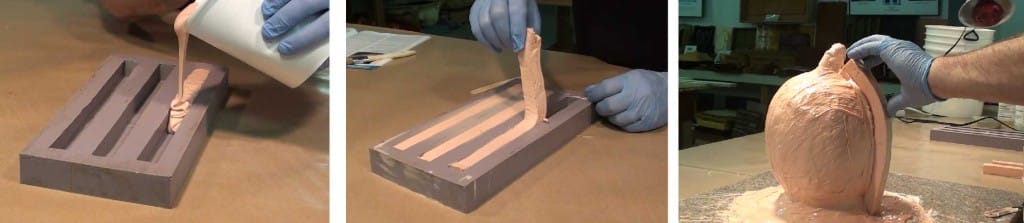
- If you are planning on cutting a mold, it is a good idea to create a thicker section of rubber in the area that you intend to cut (~0.75″). An example is shown on the far right below. You can also see this technique in a video tutorial on our YouTube Channel.
For brush-on blanket molds (like the mold pictured above), we make these thick pieces of rubber by casting the rubber in strips (we have a silicone mold that we made specifically for this purpose) and then applying them to the mold:
- When selecting a location for the cut, choose an area where seam lines will not be as noticeable if they appear on the casting (e.g., avoid the face).
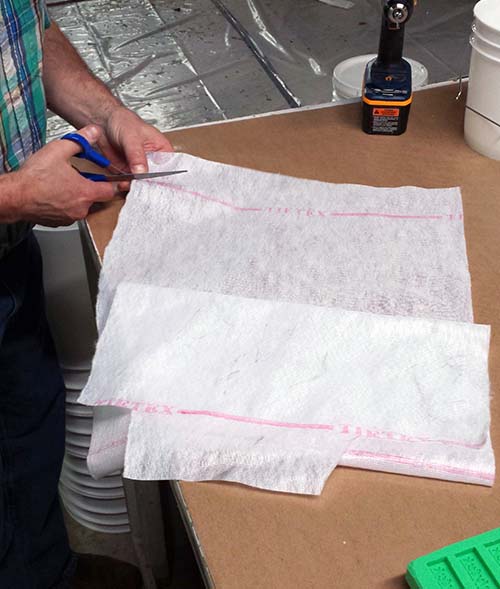
- Repetitive opening and closing of the mold can cause tears over time. Embedding Tietex® Fabric in the area where the cut ends can improve strength. The red arrow below indicates an area where TieTex would be beneficial.

Are you working on a mold making project and have a question about technique?
Call us at 800.858.5990.
Email us at sales@polytek.com.
Fill out this simple
online form.