Body Casting Tutorial: Hydrogel Mold & Cold Cast Bronze Casting
Body molds and castings can be made using a variety of products. The following tutorial details the steps needed to create a Hydrogel® body mold and a cold cast bronze body casting.
Step One: Apply Hydrogel® to Model
Position the model (the ropes, pictured in Figure 1, allow the model to hold her arms in that position more comfortably) and carefully apply Hydrogel® Mold Compound.
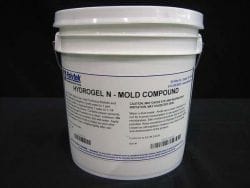
Hydrogel is a white powder that, after mixing with water, cures in approximately five minutes to a moist, rubbery material. Hydrogel is skin-safe and is useful for making quick, single-use molds. A variety of casting materials, like plaster, wax, and some polyurethane resins, can be poured directly into Hydrogel molds.
Apply the first layer of Hydrogel very carefully to avoid entrapment of air. After application and cure of the first layer, apply a mixture of baking soda, water, and food coloring [Figure 1]. Food coloring helps to ensure thorough coverage against the white hydrogel, while the baking soda and water help to adhere the second layer of Hydrogel to the first layer.
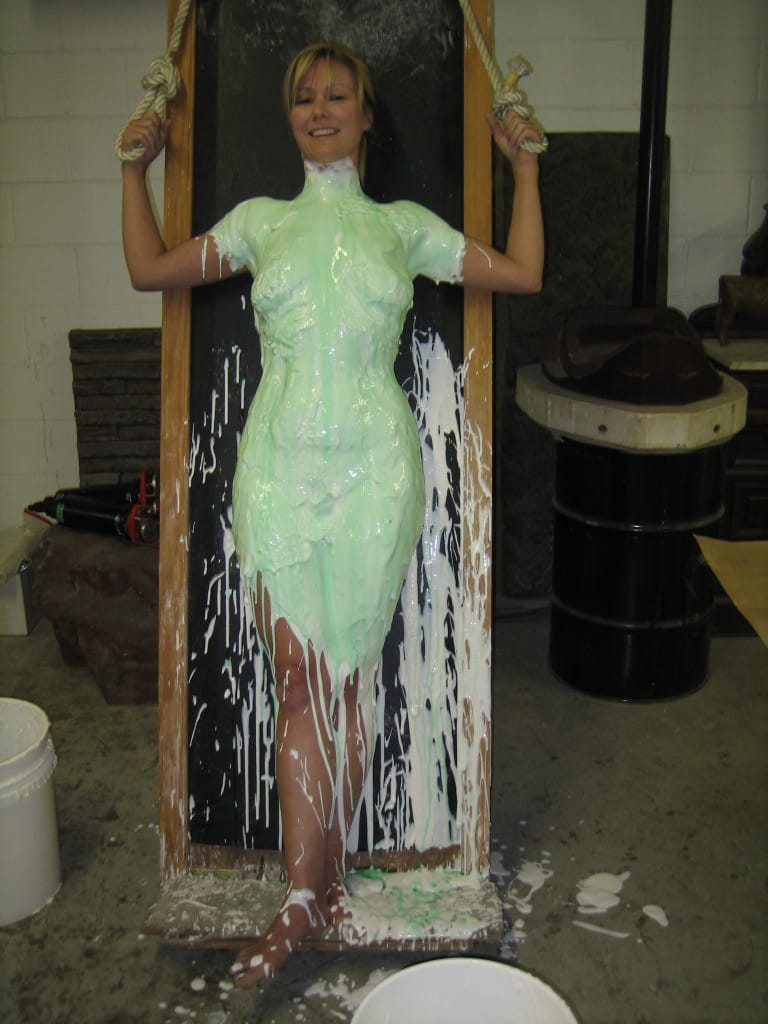
Figure 1
Apply the second layer of Hydrogel. Overall, the thickness of the mold should be approximately 1/4″.
Add cotton batting to the second layer of Hydrogel [Figure 2 & 3] so that the plaster mold shell (constructed in Step Two) will have fibers to adhere to. When the second layer of Hydrogel cures (~5 minutes), remove excess cotton and prepare the plaster.
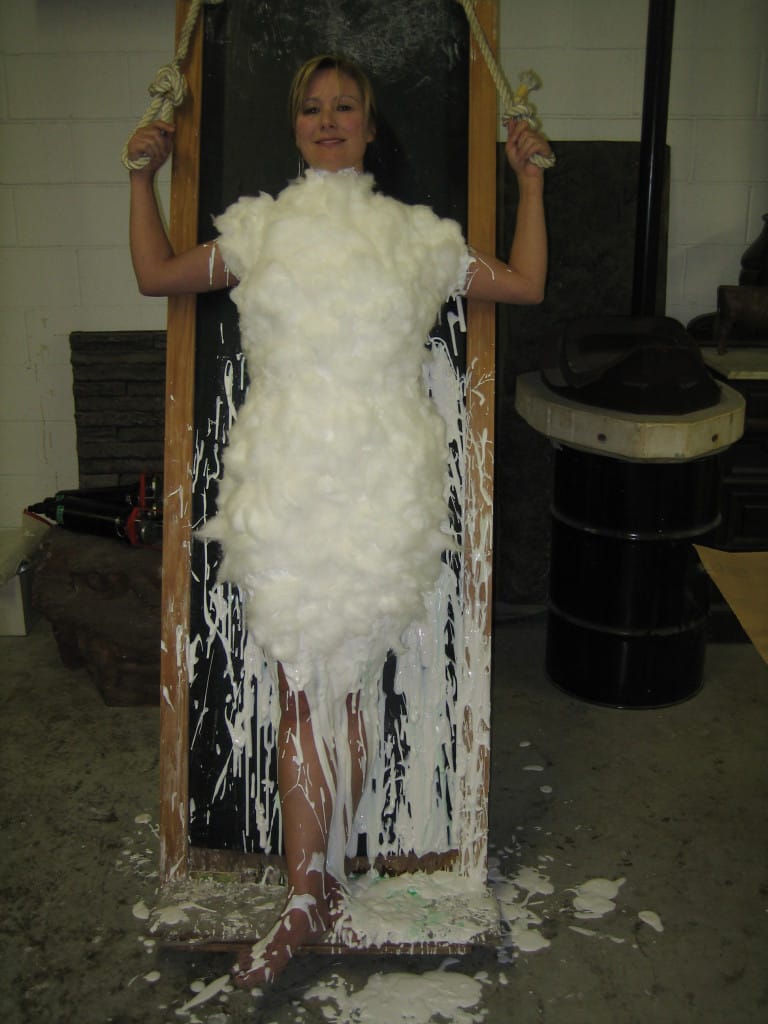
Figure 2
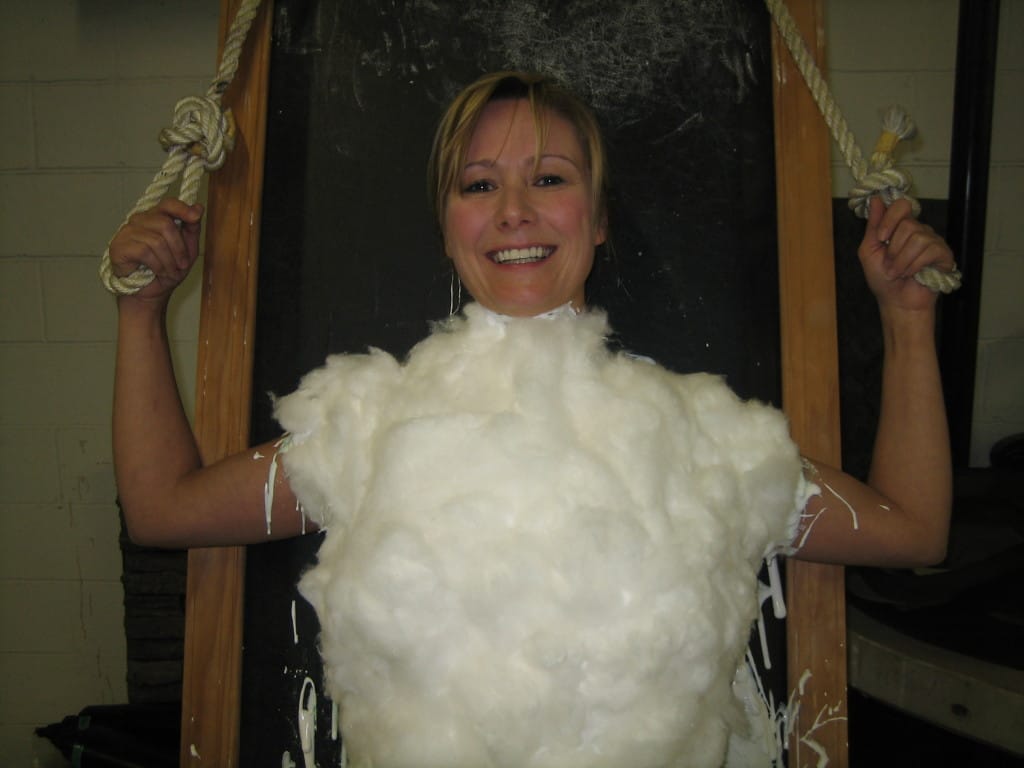
Figure 3
Step Two: Make Plaster Mold Shell
Create a hard outer shell to support the soft Hydrogel mold.
Carefully apply plaster bandages over the Hydrogel (another option might be the use of plaster and burlap) [Figure 4].
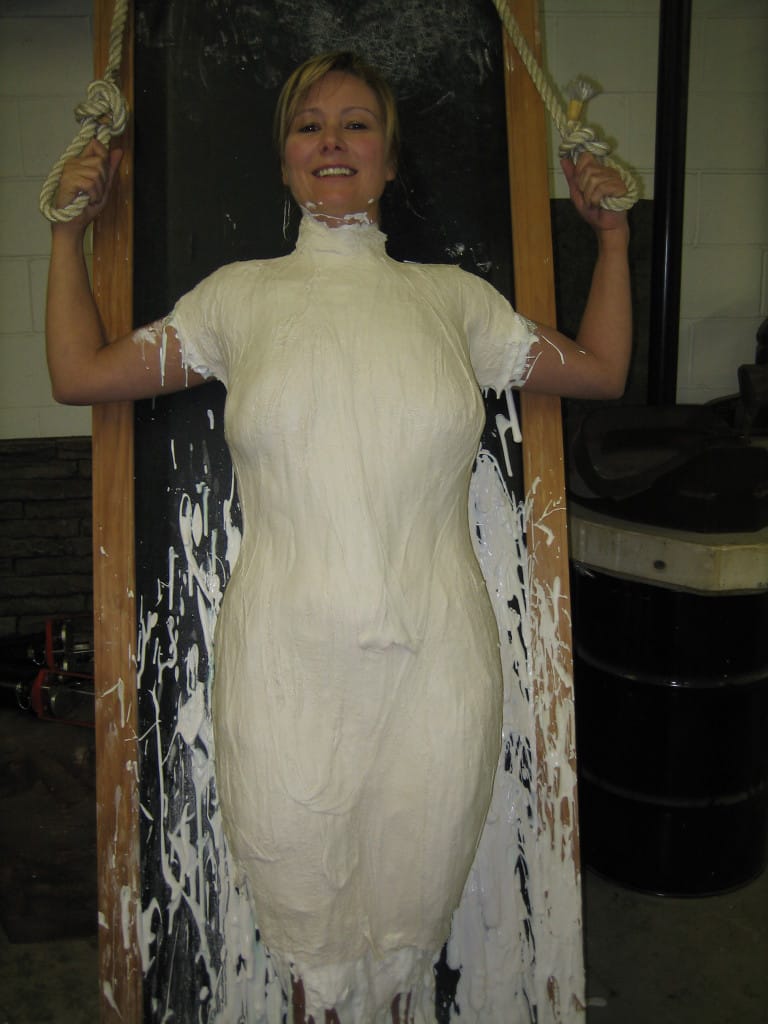
Figure 4
Step Three: Make a Plaster Casting
When the plaster mold shell has cured (the total mold making process took us approximately one hour), carefully remove it from the model [Figure 5].
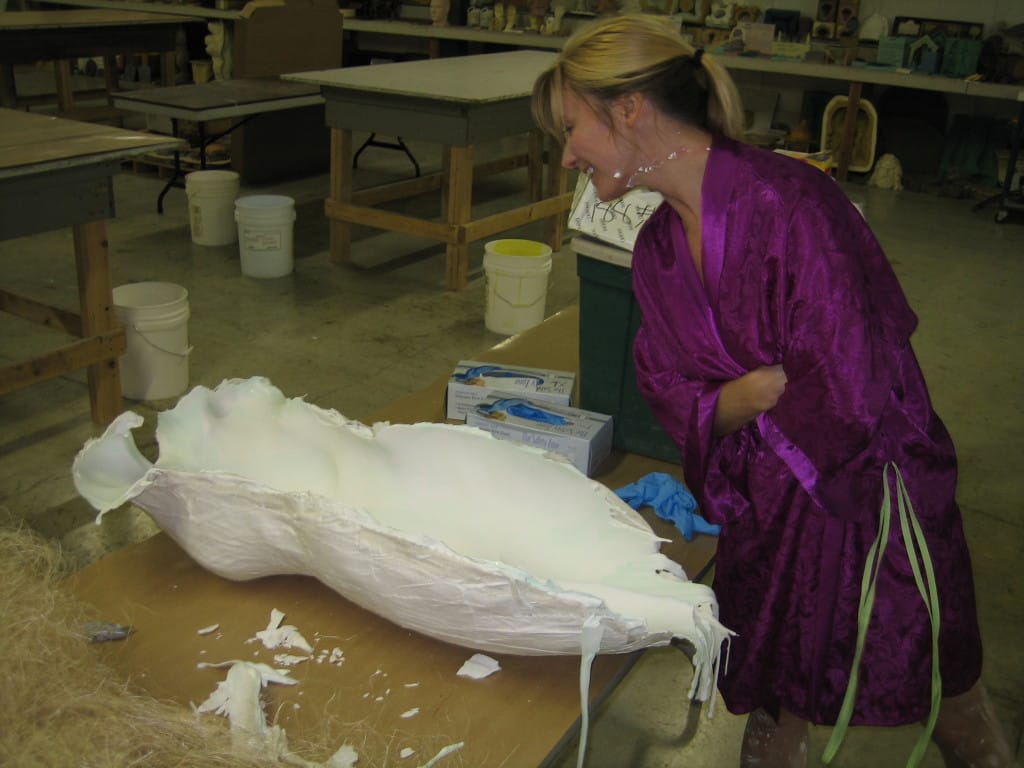
Figure 5
Immediately pour plaster into the Hydrogel mold; this needs to be done right away as Hydrogel molds dry out very quickly and become unusable.
When the plaster has cured, remove it from the Hydrogel mold [Figure 6] and retouch the casting as necessary (at this point, the Hydrogel mold is no longer needed).
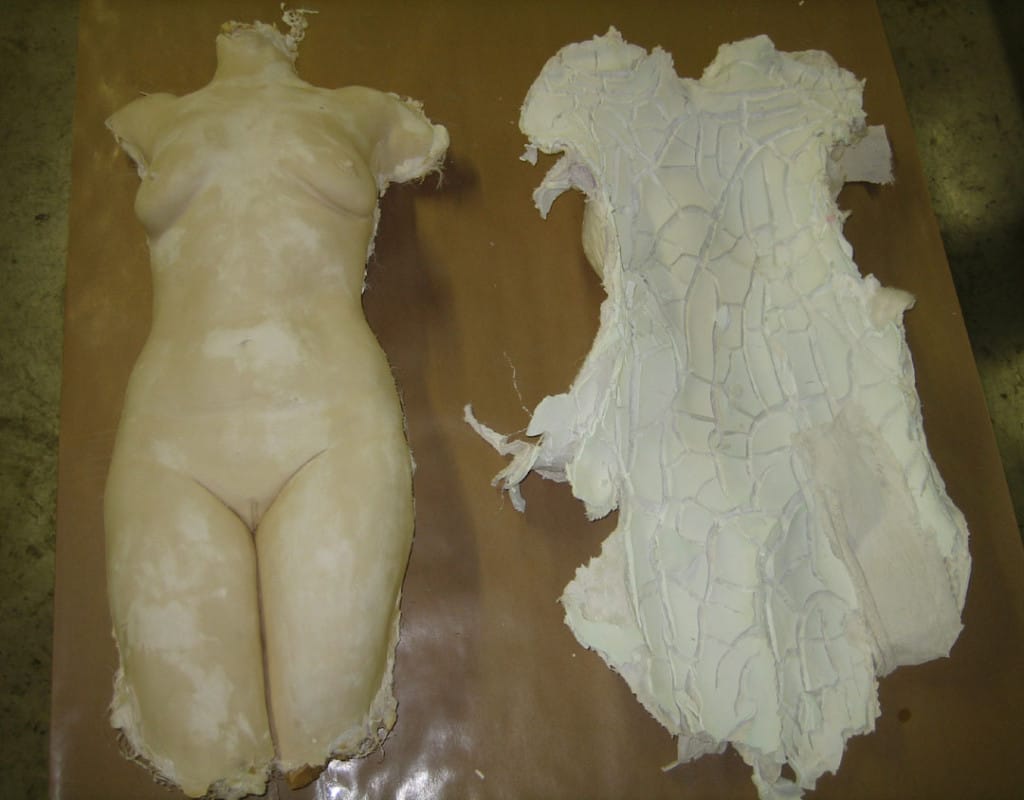
Figure 6
Step Four: Make a Rubber Mold of the Plaster Casting
After retouching the plaster casting, a long-lasting rubber mold can be made.
We chose to use Polygel® 40, a self-thickening polyurethane rubber, to create this mold (NOTE: Polygel® 40 is no longer available – Polygel® 35 has taken its place). Polygel 35 has a mix ratio of 1A:1B, a working time of 8-10 minutes, and demold time of 8-12 hours.
Apply a relatively thin first layer of rubber in order to pick up detail and avoid air bubble entrapment [Figure 7].
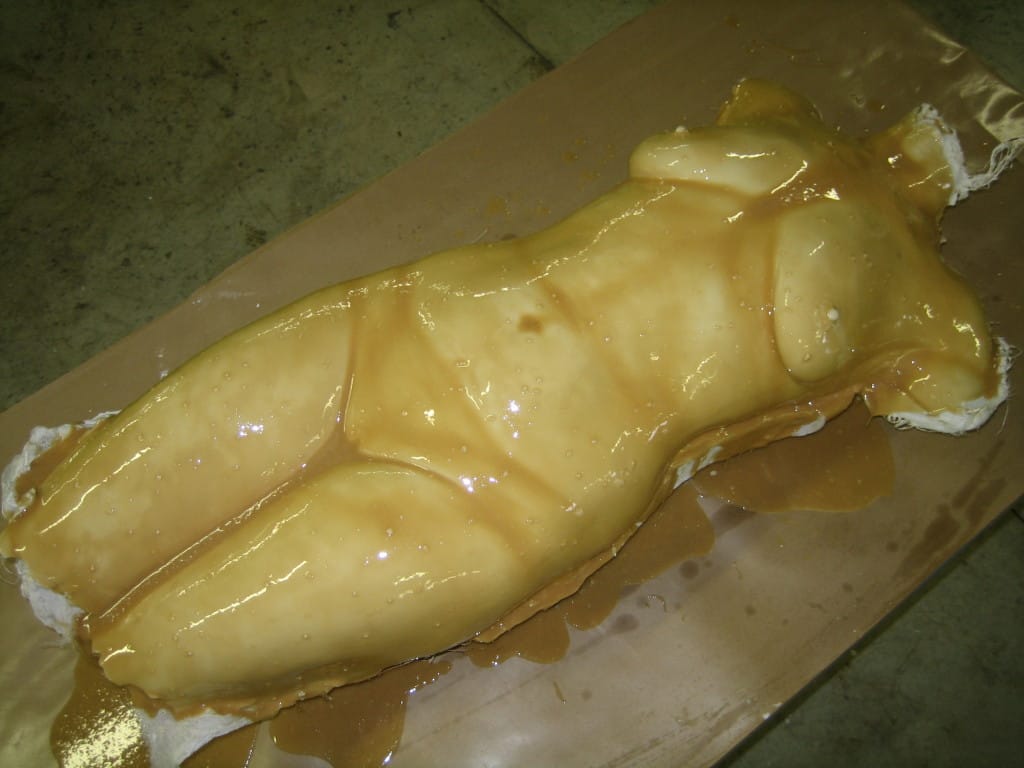
Figure 7
Apply layers of rubber until a mold thickness of at least 1/4″ is reached [Figure 8]. Always allow the previous layer of rubber to gel before applying the next one.
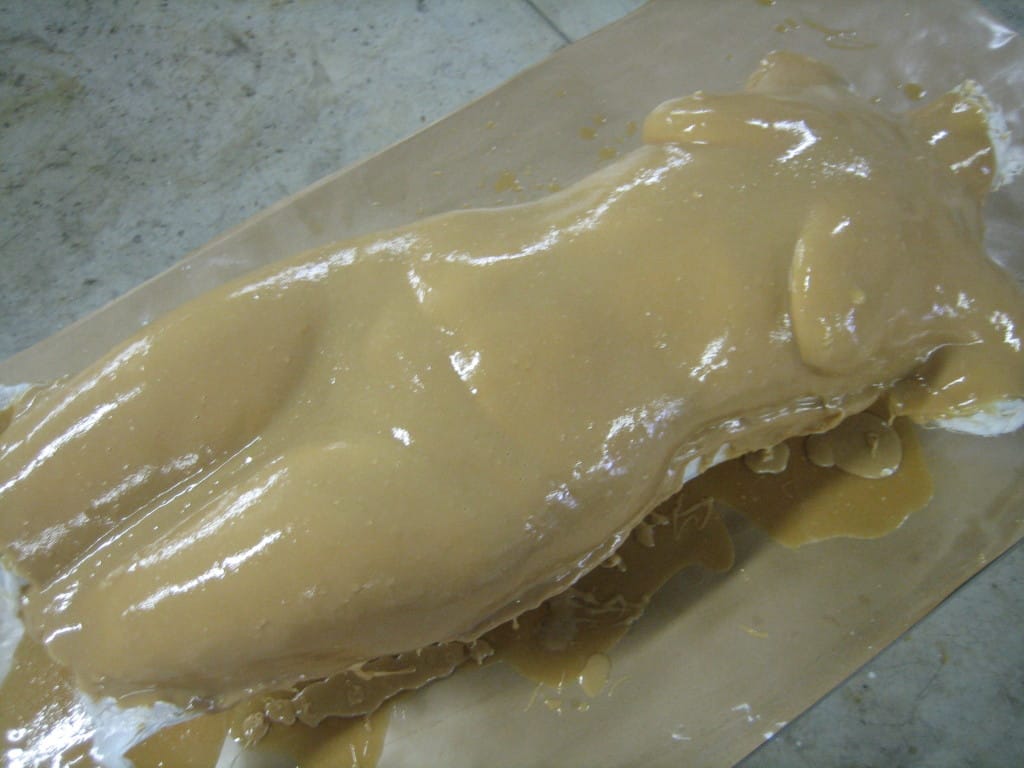
Figure 8
If necessary, add PolyFiber II (a thickening agent) to Polygel to create a thicker rubber for filling undercuts on the casting.
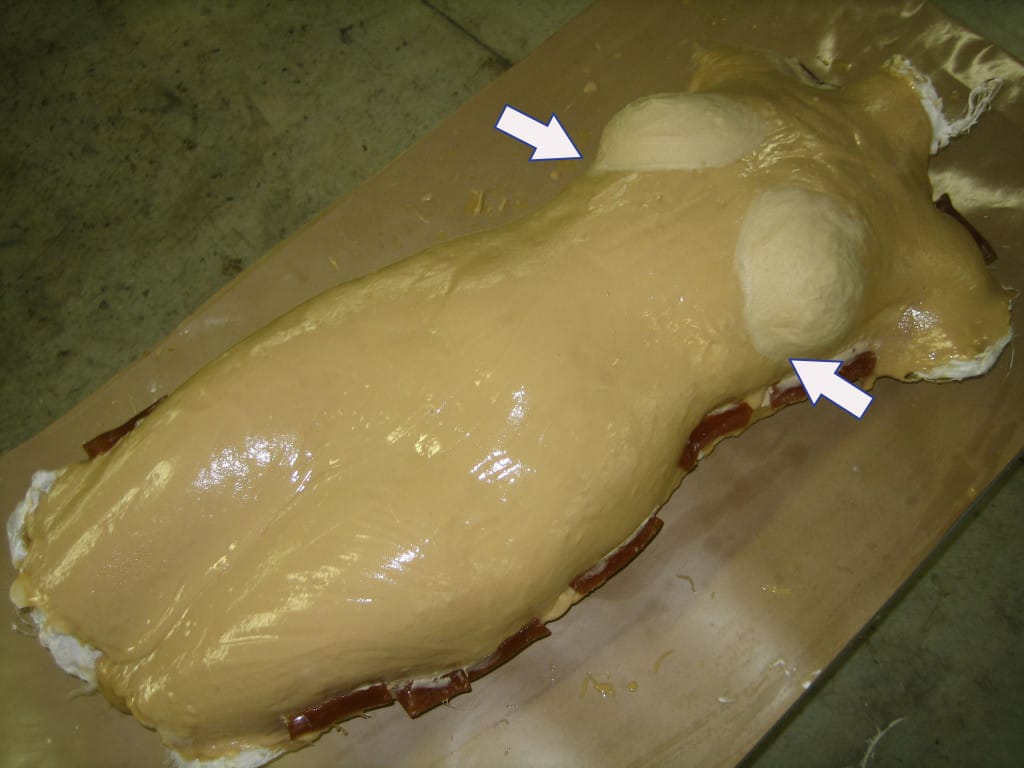
Figure 9
Allow the rubber to fully cure before moving on to the next step.
Step Five: Make a Two-Part Plastic Mold Shell
Construct a shim (cardboard and duct tape are used here) and registration marks (clay and rubber are used here) to align the two halves of the mold shell [Figure 10]. Apply a sealer (e.g., paste wax) to the cardboard shim to avoid bonding of the plastic. Also apply a release agent (e.g., Pol-Ease 2300 Release Agent) to the shim, rubber and clay to avoid bonding.
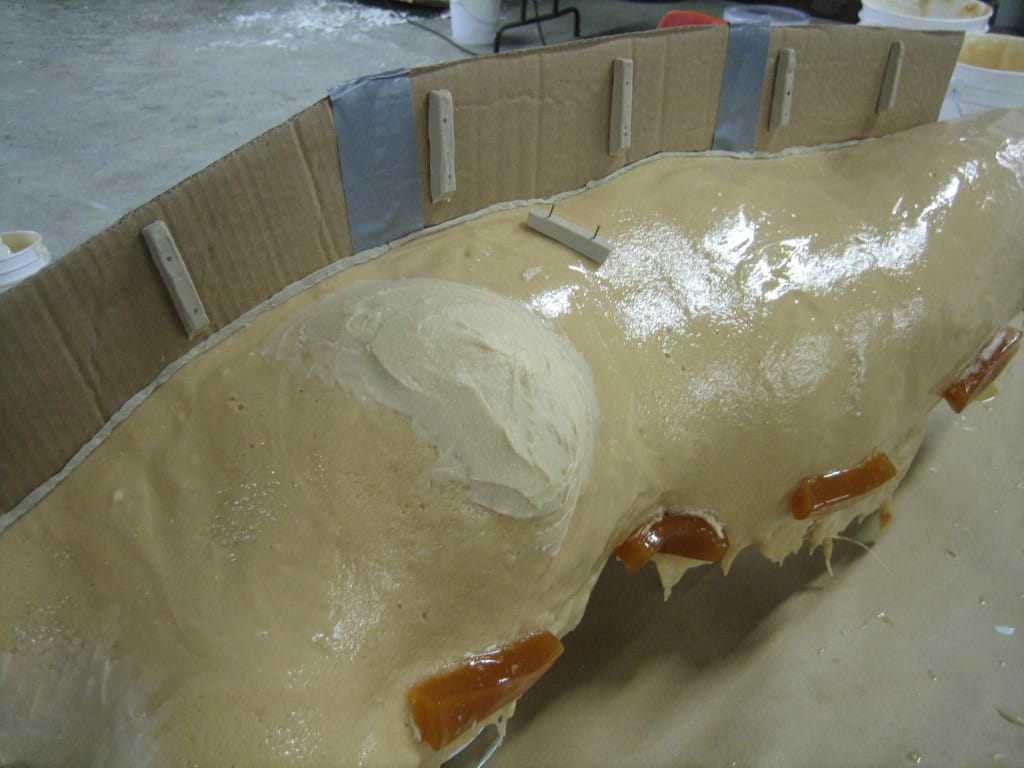
Figure 10
Mold Shell Material: Combine Poly 1512X polyurethane plastic and Poly Fiber II (a thickening agent) to create a plastic with a brushable consistency [watch a video tutorial of creating a mold shell here: https://youtu.be/lIhGx42xww0].
Brush-on one half of the mold shell (to where it meets the shim) and allow it to cure (approximately 30 minutes).
NOTE: Cured plastic can have very sharp edges, so consider sanding down the edges before handling the mold shell.
Remove the cardboard shim, apply a release agent to the exposed cured plastic and rubber and then brush on the second half of the mold shell and allow it to cure. [Figure 11].
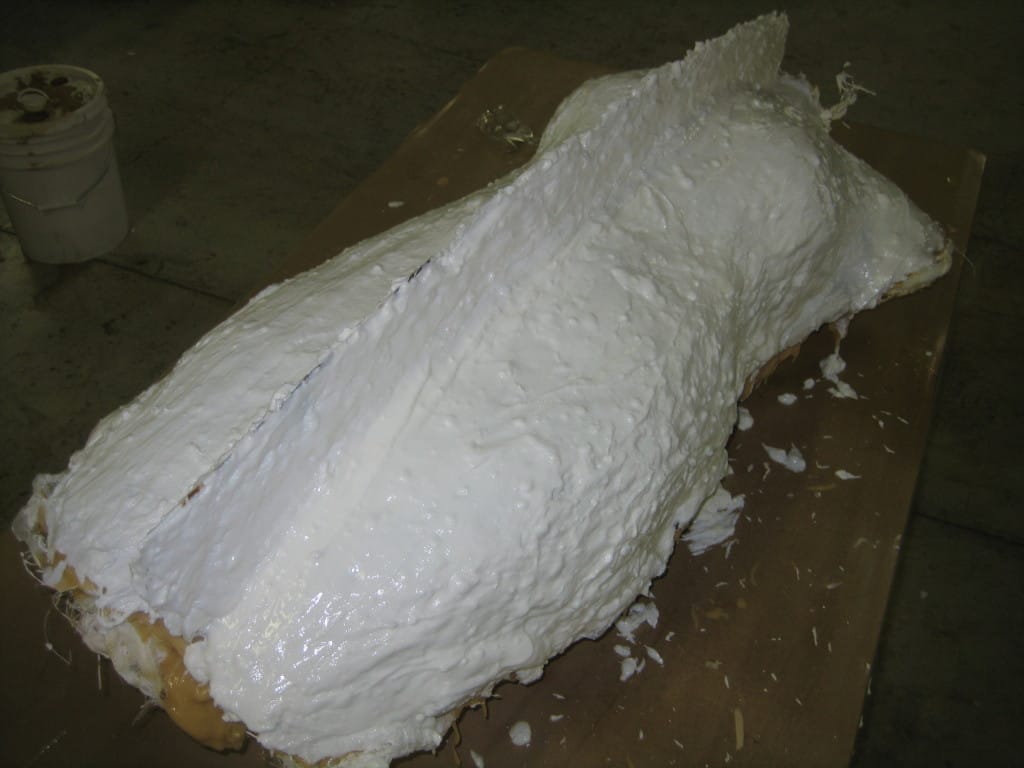
Figure 11
When the mold shell is completely cured, drill holes through the parting line so hardware [e.g., nuts and bolts) can be inserted in order to secure the two pieces together for casting [Figure 12].
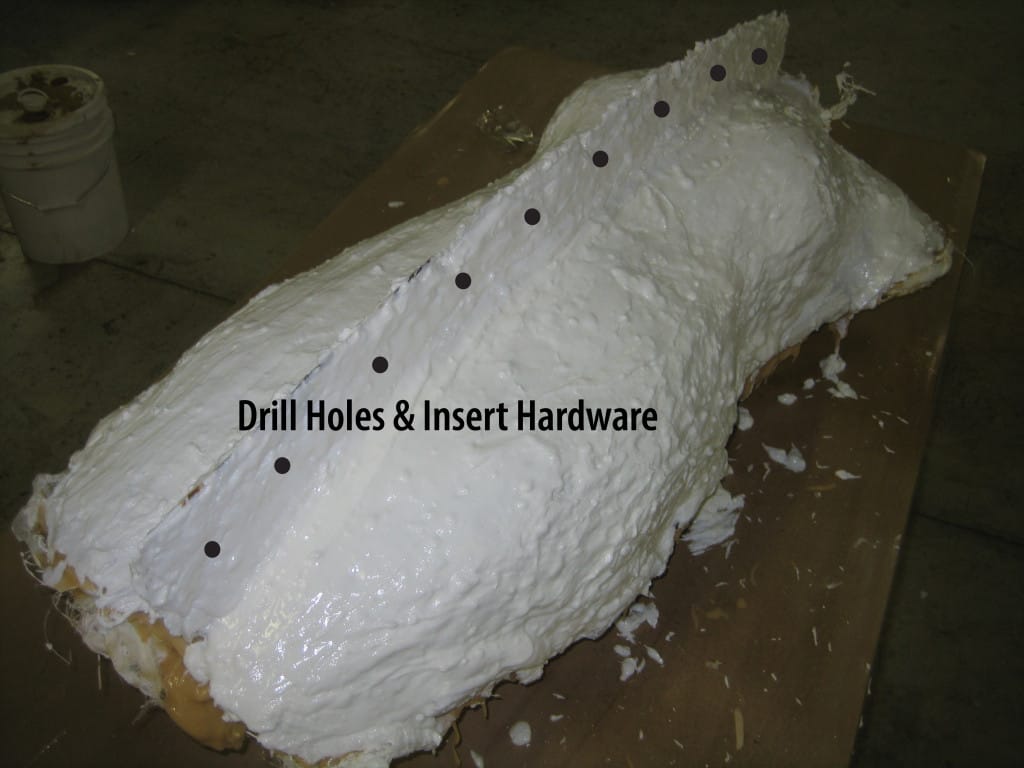
Figure 12
Step Six : Cold Cast Bronze
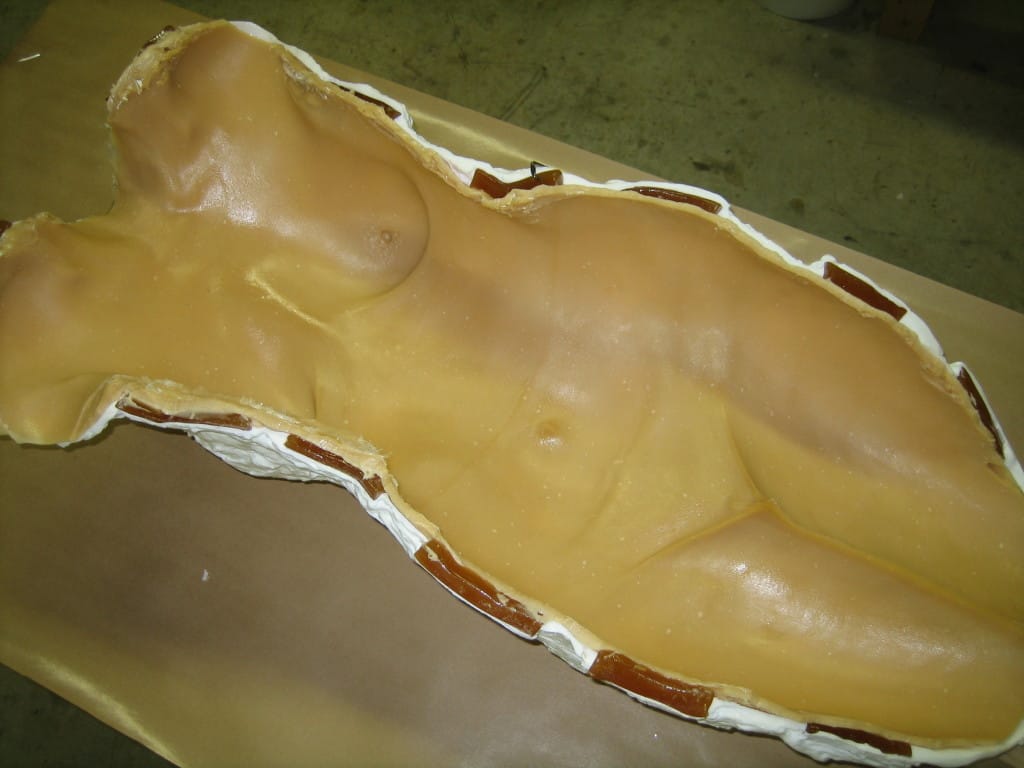
The mold is now ready for casting. To create a cast bronze effect, use a combination of EasyFlo 60 polyurethane resin, Bronze Powder, and PolyColor Brown Dye [Figure 13]. EasyFlo 60 has a mix ratio of 1A:1B, a short working time of 2-2.5 minutes, and a demold time of 15-30 minutes.

Figure 13
Spray and brush out Pol-Ease® 2300 Release Agent onto the mold before pouring the resin mixture.
Use the following volume ratio to create the cold cast resin:
By Volume:
1 Part EasyFlo 60 Part A
1 Part EasyFlo 60 Part B
2 Parts Bronze Powder
Thoroughly mix the resin and brush it into the Polygel® mold. Because of EasyFlo 60’s short working time, it is important to work relatively quickly.
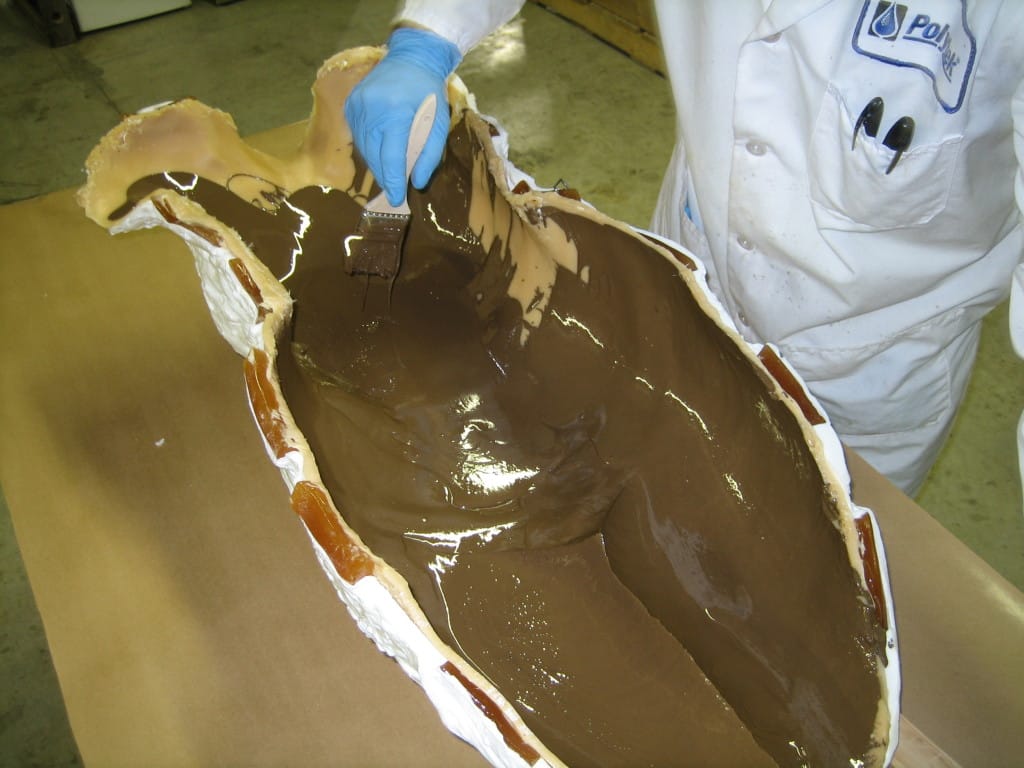
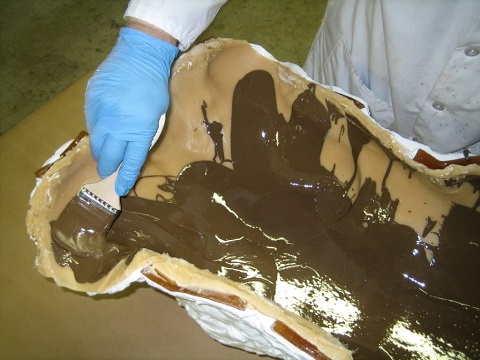
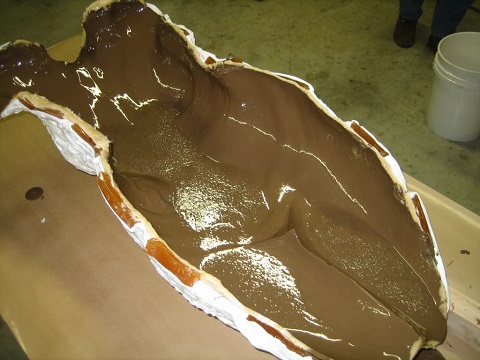
After allowing the mixture to cure for approximately 15-30 minutes, apply another layer of EasyFlo 60 plastic and PolyColor Brown Dye as supportive backing (we did not use bronze powder in this layer).
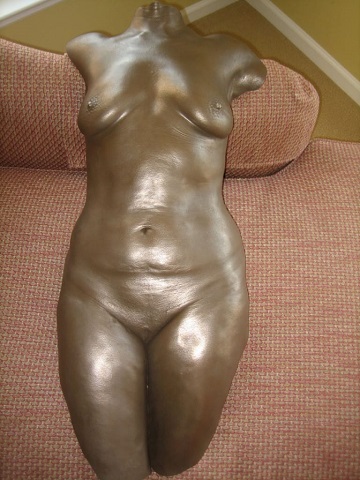
The Final Cold Cast Bronze Body Casting
When the resin is completely cured, remove it from the mold and hand burnish it with steel wool to expose the metal particles. Additionally, a patina can be applied (not pictured here).
Would you like to speak with a Polytek Technical Support staff member about your next life casting project?
Call Us at 800.858.5990.
Email Us at sales@polytek.com.
Fill out this simple
online Contact Form.